如何在 iPhone 上疊加照片 | 步驟說明
什麼是圖片覆疊?圖片覆疊是指將一張圖片放在另一張圖片之上。它們是一種有趣而直接的方式,讓您的圖片更有創意,例如結合兩張臉,在照片上加上標誌,或將一張圖片放在另一張圖片上面。
在本指南中,我們將教您如何使用不同的方法在 iPhone 上疊加照片,從 Apple 內建的 Shortcuts 應用程式到更方便的 AI Ease 線上解決方案,應有盡有。不需要任何編輯經驗,只需按照步驟操作,就能創造出令人驚艷的圖片!
如何使用捷徑應用程式在 iPhone 上疊加照片
Apple 的 Shortcuts 應用程式可協助您執行許多複雜的動作,包括在 iPhone 上把一張照片放在另一張照片上。只需一次性設定,即使沒有第三方應用程式,你也可以毫不費力地將兩張照片分層。
在 iPhone 上疊加照片的 9 個步驟
使用自訂捷徑,你可以將多張圖片重疊在一起。以下是如何使用捷徑應用程式在 iPhone 上疊加照片。如果你想更快得到疊加的圖片,可以到下一節學習如何使用 AI 疊加工具。只需 4 個步驟,您就可以在線上疊印 2 張圖片!
步驟 1.在捷徑應用程式上建立新捷徑
本步驟將初始化您的照片覆疊工作流程。您將建立一個自訂的捷徑,來為圖片套色。
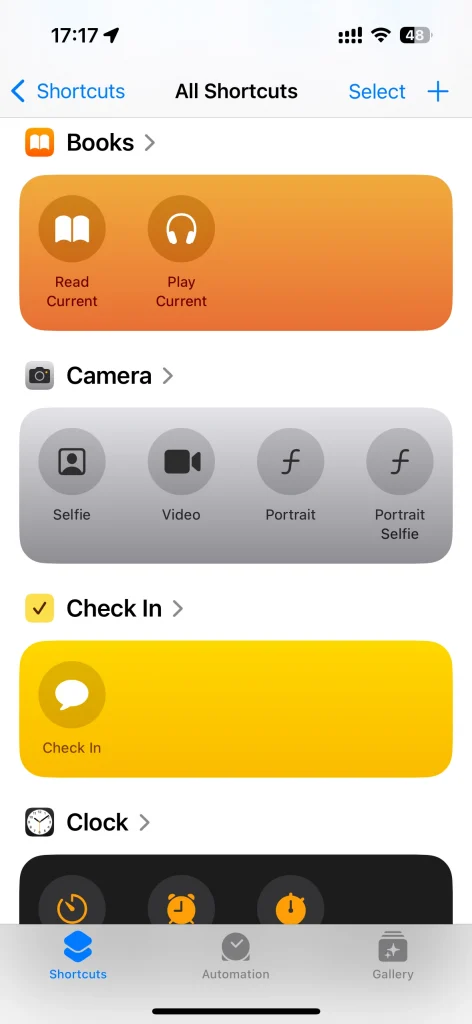
- 開啟 iPhone 上的Shortcuts應用程式。
- 點選右上方的「+」圖示,開始新的捷徑。
- 然後按一下「新增動作」,開始新增步驟。
步驟 2.啟用「顯示在共用工作表」選項
此步驟會告訴您的 iPhone 從哪裡取得圖片,並讓您快速存取覆疊工具。
- 點選捷徑名稱旁邊的"i"圖示 (頂端列)。
- 看到新頁面時,打開「顯示在共用工作表」。
- 然後點選完成返回。

步驟 3.選擇媒體檔案格式
回到新的捷徑頁面,繼續按照以下步驟學習如何在 iPhone 上為相片分層。
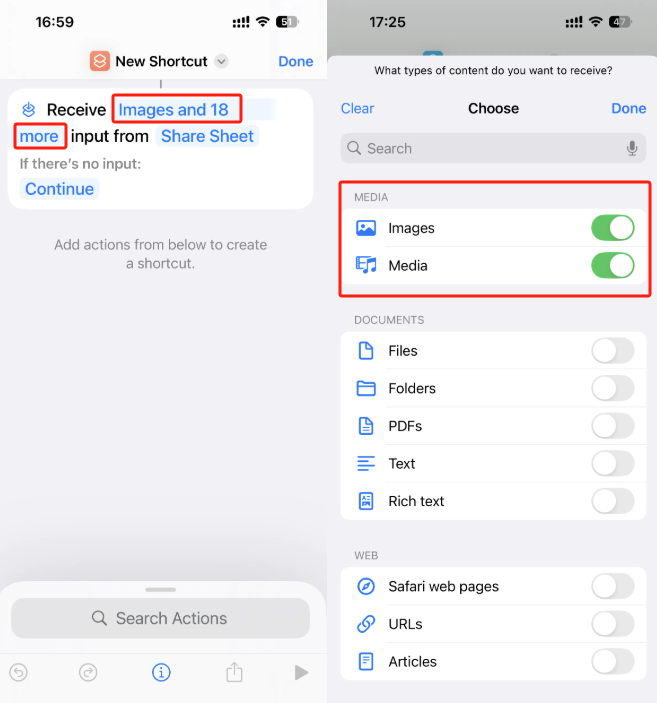
- 點選「Images and N more」'的位置。
- 關閉影像和媒體以外的所有媒體格式。
- 選取後,按完成。
步驟 4.新增「選取相片」動作 (兩次)
若要覆疊兩張影像,請選擇一張為前景,一張為背景。添加此動作兩次,可讓捷徑要求兩個獨立的影像。
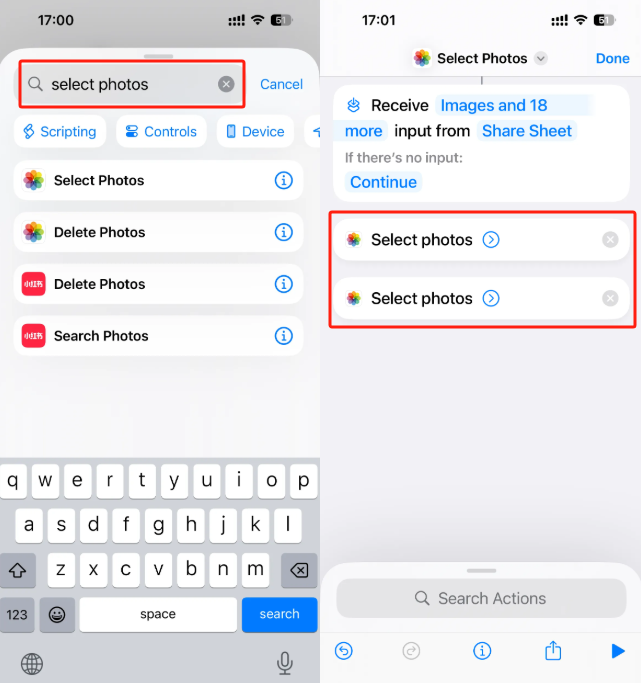
- 在新的捷徑頁面上,選擇「新增動作」或直接按一下 頁面底部的搜尋列 。
- 輸入 「選取相片」 ,然後點選新增。
- 重複新增 秒「選取相片」動作。
步驟 5.新增「覆蓋影像」動作
這是將您選取的兩張照片融合在一起的關鍵動作。它會在另一張照片上再加上一張照片,建立新的影像。
- 在搜尋列中輸入「Overlay Image」,即可新增動作。
- 選擇 覆疊影像動作,合併 2 張 iPhone 照片。
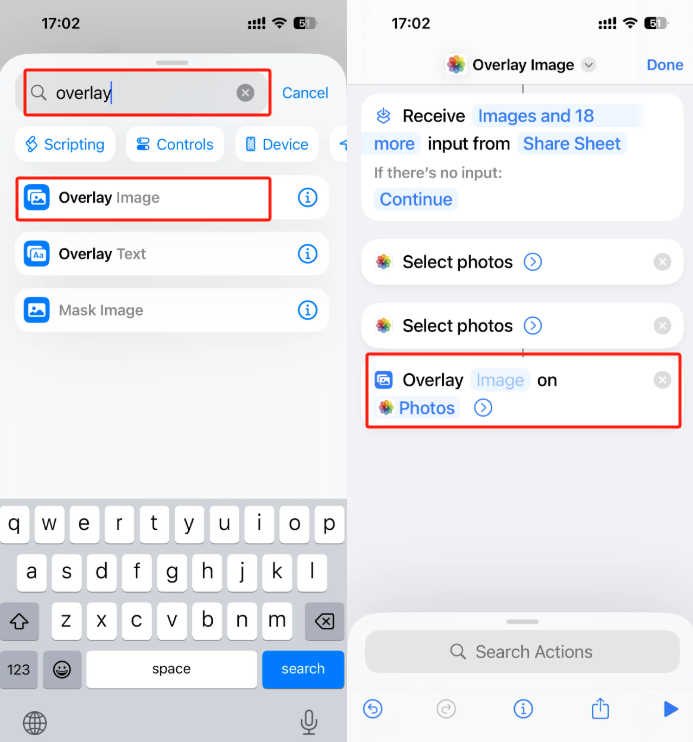
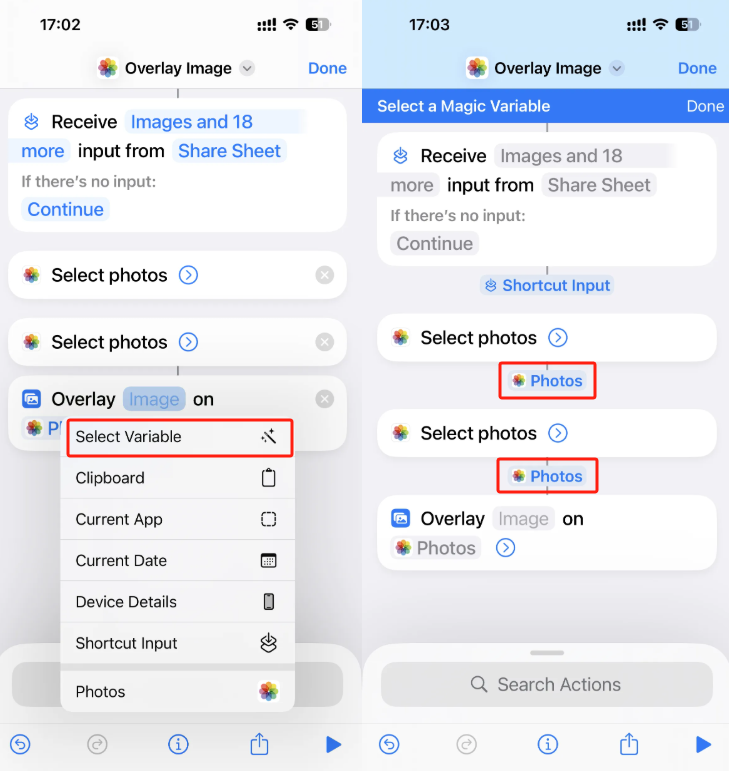
步驟 6.設定變數連接影像內容
透過指定 Magic Variables,您可以告訴捷徑,哪些選取的相片會貼到覆疊圖片的哪個位置 (上方或下方)。這樣您就可以學習如何在 iPhone 上貼上另一張圖片。
- 點選覆疊影像動作中的第一個 「影像」欄位。
- 選擇「選擇變數」。
- 從藍色列中,點選第一個「Photos」標籤 (來自您的第一個 Select Photos 動作)。
- 重複第二個「Image」欄位,連結第二個「Photos」變數。
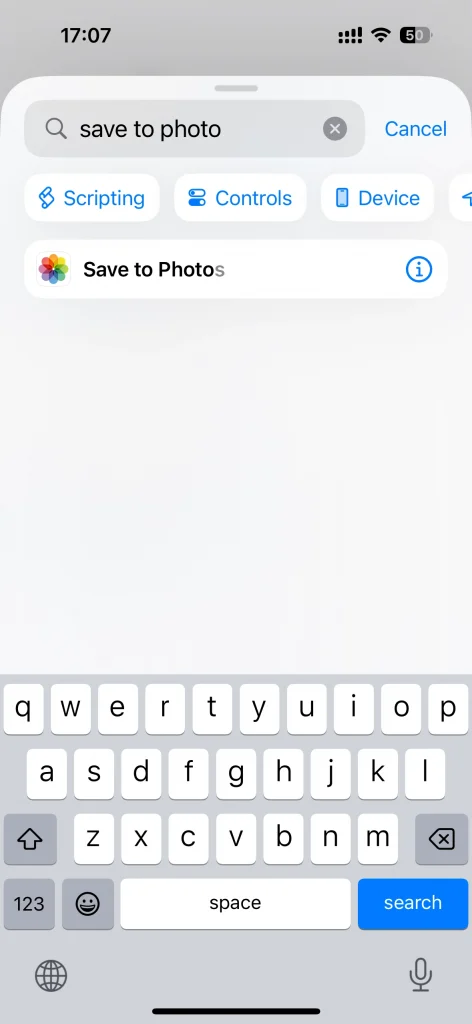
步驟 7.新增「儲存至相片」動作
在 iPhone 上疊加圖片後,您可以直接將最後疊加的圖片儲存到相簿。
- 按一下搜尋列
- 搜尋「儲存至相片」
- 選擇一個相簿 作為預設相簿。
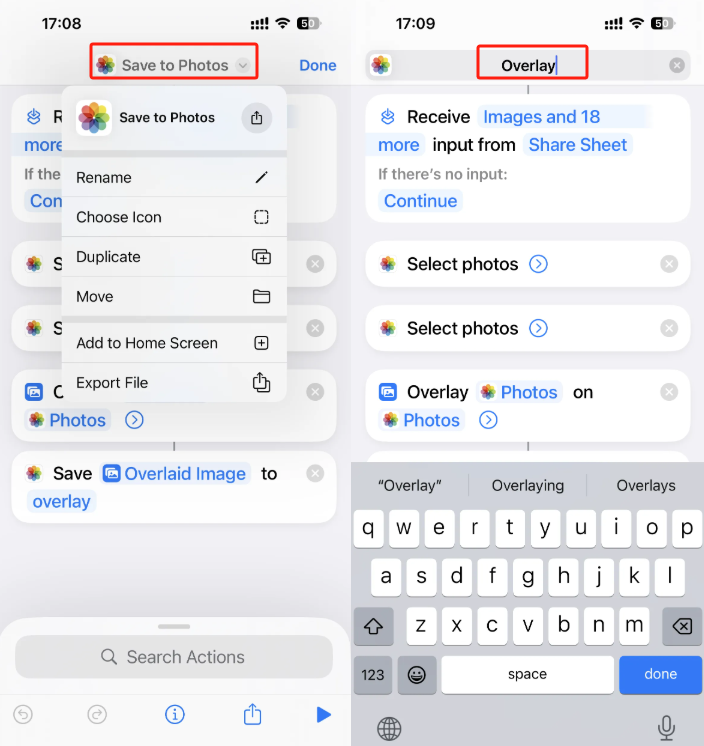
步驟 8.重新命名並完成捷徑
之後,您可以給捷徑一個清楚的名稱,讓您在使用「共用工作表」時容易找到。
- 點選上方的捷徑名稱。
- 輸入新名稱,如「Overlay」或其他您喜歡的名稱。
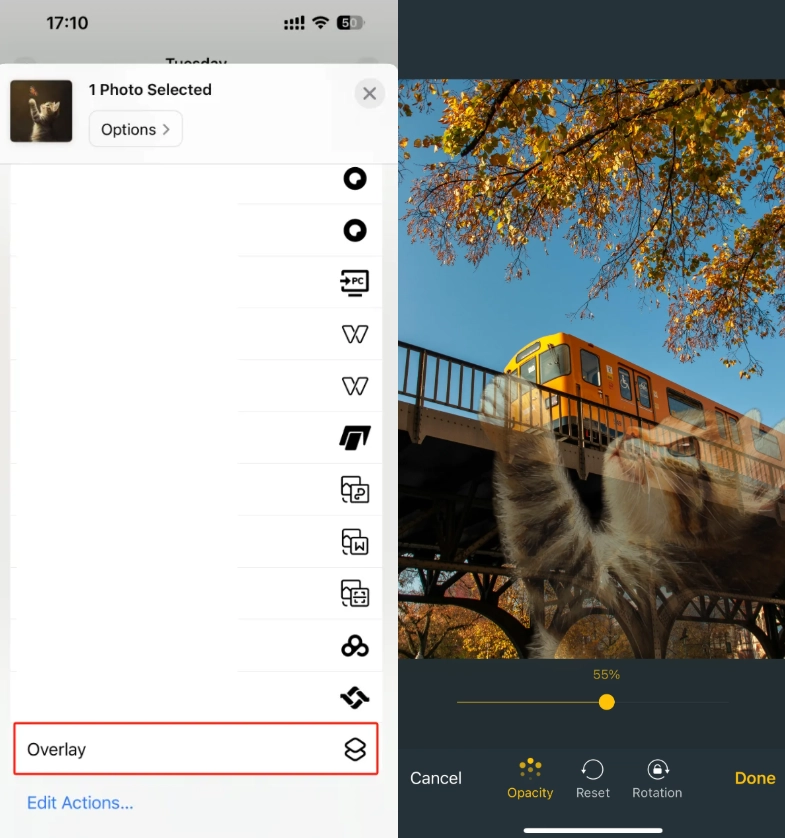
步驟 9.從照片應用程式執行覆疊
現在您的捷徑已準備就緒,是時候進行測試了。您可以直接從「照片」應用程式執行覆疊,而無需再次開啟「捷徑」。
- 開啟「照片」應用程式。
- 點選 [選取],然後選擇兩張您要加入圖片到圖片的照片。第一張將會是貼圖 (上方),第二張則是背景。
- 點選分享圖示 (帶向上箭頭的方塊)。
- 向下捲動並選擇您的捷徑 (例如:「Overlay」)。
- 等待幾秒鐘,您的覆疊圖片就會自動儲存。您可以根據需要調整不透明度。
以上就是如何在 iPhone 上疊加兩張照片的全部步驟。雖然使用捷徑的步驟有點複雜,但不用擔心,你可以按照上面的詳細步驟來操作。如果你想學習如何在 iPhone 上合併兩張照片而不需要應用程式,下面的環節會給你答案。
如何在 iPhone 上把兩張圖片拼在一起而不需要應用程式
如果您正在尋找更簡單、更快速的方式來 貼圖 AI Ease 是更好的選擇。AI Ease 的 線上背景移除器可以智慧地移除背景,讓您免費輕鬆地在 iPhone 上線上新增背景並覆蓋圖片。
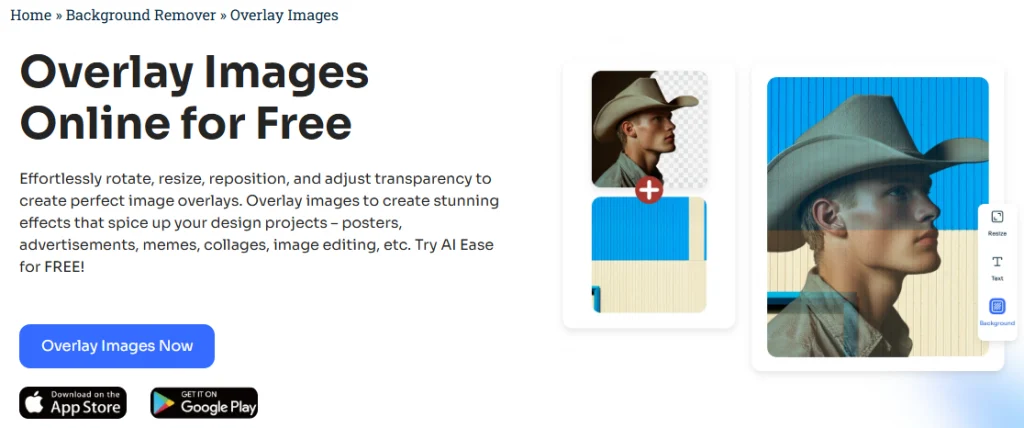
為何選擇 AI Ease 作為線上疊印工具?
AI Ease 讓線上圖像貼圖毫不費力,即使是不精通技術的使用者也能輕鬆上手。以下是它脫穎而出的原因。
- 易於使用: 只需開啟 Safari 即可立即開始使用。
- AI 驅動的背景移除功能: 數秒內自動移除任何影像的背景。
- 直覺的拖放編輯器:用手指調整大小、不透明度和位置。
- 即時預覽: 立即看到覆疊結果,沒有渲染延遲。
- 直接分享:一按即可下載或分享至 Instagram、Facebook 或訊息。
4 使用 AI 輕鬆在 iPhone 上覆蓋照片的步驟
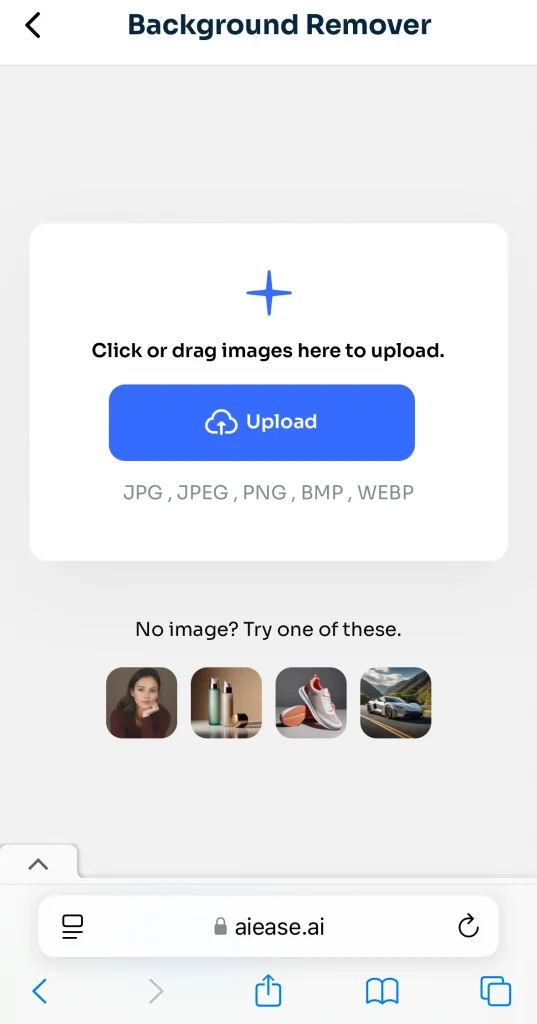
現在,您可以造訪 AI Ease 的背景移除器網站,學習如何輕鬆在 iPhone 上覆蓋圖片。
步驟 1.上傳一張照片到我們的 AI 背景移除器。它會在幾秒鐘內自動移除圖片背景。
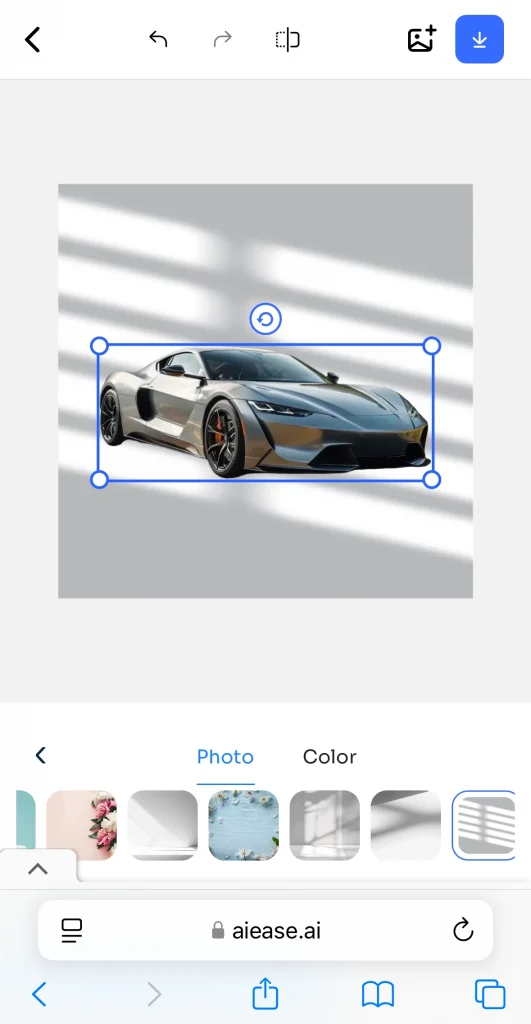
步驟 2.點選背景,然後從上方工具列中選擇 「我的相片」選項。然後從「圖片庫」或「檔案」中選擇一張圖片作為底圖。
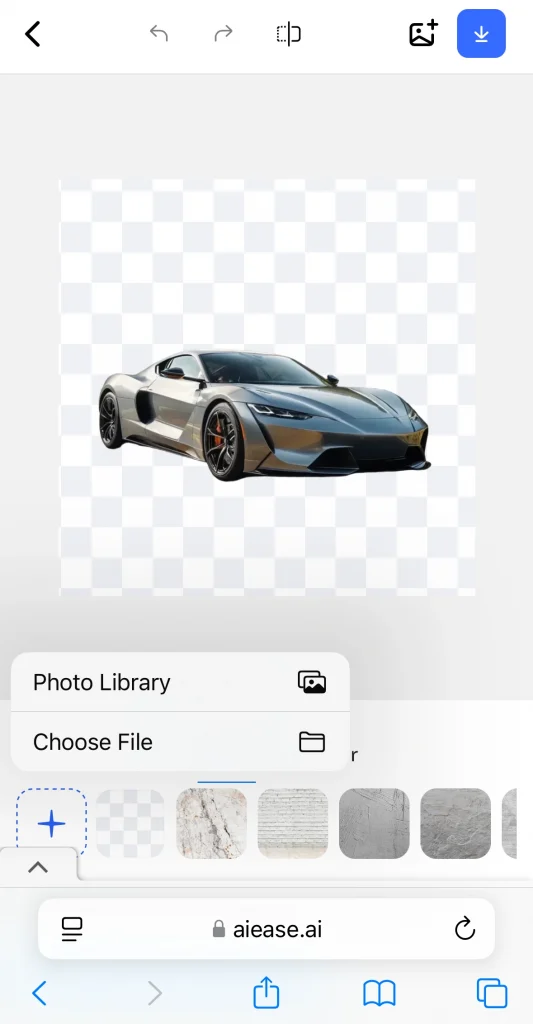
步驟 3.選取已移除背景的圖片,然後調整其不透明度、位置和方向,即可在 iPhone 上無縫地為圖片新增圖片。
步驟 4.完成後,按一下「下載」,將疊加的圖片儲存到您的裝置,或直接分享到您喜愛的社交平台。
總結
以上就是有關如何在 iPhone 上覆蓋照片的全部內容。雖然 Apple 的 Shortcuts 應用程式提供了原生選項,但需要多個步驟和設定。如果你想要更快速、更直接、更視覺化的方法,AI Ease 是結合 iPhone 兩張照片的完美解決方案。無論您是創作 memes 的隨興使用者,或是設計故事視覺效果的內容創造者,都可以使用 AI Ease 來疊加圖片,而無需使用 app,節省您的時間與點選次數。